Top 5 Best Eye Creams!

If there’s one night time routine I never skip (apart from always removing my makeup before going to bed), is eye cream. I have to admit, I wasn’t always a fan and I had never tried it till I started working as a makeup artist a few years ago and was given some samples. Not wanting the creams to go to waste, and wondering if they hype behind them was true, I decided to give it a go. From that day on, I became a convert. I know list eye cream as a must-have for my night routine (along with lip balm).

I know there are many creams out there that promise the impossible, but if you’re going to invest in any sort of face cream, I’d say splurge on the eye cream. Here’s why. The skin around your eye are is the thinnest, meaning it’s also the first place to show signs of aging. Any sun damage, free-radical damage, and sleep deprivation comes in the form of crows feet. But there’s a way to combat this.

What you need is an opulent cream that locks in moisture and helps keep those dreaded crows feet at bay.

So, where do you start? Throughout the years I’ve come across over a hundred eye creams, varying in ingredients and price. I know everyone has different needs, but when I go to purchase an eye cream I don’t necessarily grab the one that’s “anti-aging,” but rather opt for the one that’s rich in moisturizing formulas.

Below are my current Top 5 Eye Creams and what makes them stand out from the rest:

truffleeye

Skin & Co. Roma Truffle Therapy Eye Concentrate

Key Ingredient: Truffle Extract

Why I love It: This cream is thoroughly hydrating. It feels luxurious and has a fresh scent to it. It’s supposed to help diminish the the appearance of fine lines and crow’s feet. Whenever I put it on my skin feels extra moisturized.

Price: $66

Where to Buy It: Skinandcoroma.com


olay-pro-retinol-eye-treatment

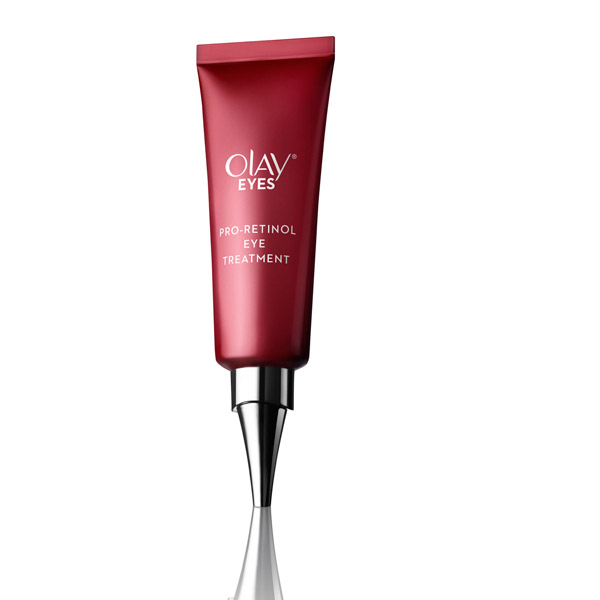
Olay Eyes Pro-Retinol Eye Cream Treatment

Key Ingredient: Retinol

Why I love It: This cream doesn’t feel as thick as my usual go-to eyecreams do, however, retinol is a key ingredient when it comes to fight the first signs of aging. This cream promises to visibly reduce crow’s feet and help cell turnover in just four weeks. I’ve found that it definitely keeps to its word.

Price: $24

Where to Buy It: Target, Wal-Mart, Amazon, or CVS

origins

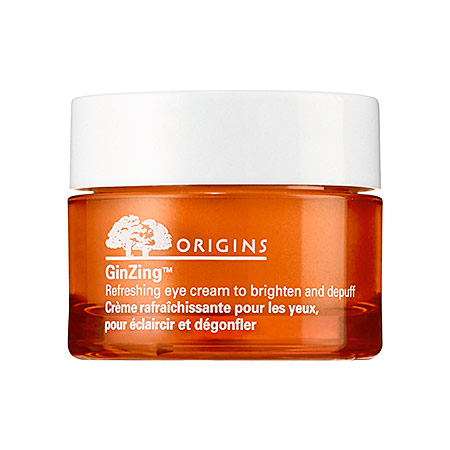
Origins GinZing Refreshing Eye Cream

Key Ingredients: Caffeine, Panax Ginseng, and Magnolia extract

Why I Love It: This cream is thick and refreshing. It’s focus isn’t on wrinkles, but rather it helps with de-puffing, brighten, and reduce dark circles. I usually put this on at night, but with caffeine being one of its active ingredients, it could also be used in the morning to wake up your skin. It leaves your skin feeling tingly and fresh.

Price: $32

Where to Buy It: Sephora or Amazon

burtbee

Burt’s Bees Renewal Smoothing Eye Cream

Key Ingredient: White Hibiscus

Why I Love It: This cream is lightweight but at the same time feels incredibly emollient. Unlike the previous creams, this one targets both wrinkles and dark circles. Another bonus is that the ingredients are all natural, which is one of the reasons why I love Burt’s Bees products so much. The texture of this cream is wonderful, it quickly absorbs into the skin without leaving any oily residue. I also used this cream when I burned my wrist with my straightening iron and it just so happened to be on my tattoo, and this cream helped the burn heal seamlessly without causing any damage to the tattoo. It’s seriously a very nourishing cream for your skin.

Price: $12

Where to Buy It: Target, CVS, or Amazon

bareminerals-renew-hydrate-eye-cream_500x500

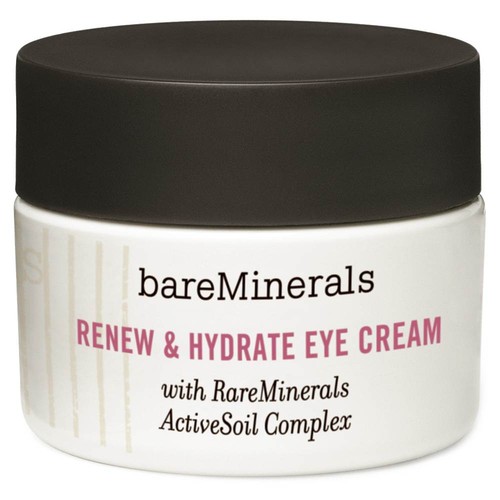
Bare Minerals Renew & Hydrate Eye Cream

Key Ingredient: Active Soil Complex

Why I Love It: This cream is incredibly rich. It makes my eye area very soft whenever I use it. It’s not oily and fast absorbing. This was the first eye cream I ever used and probably why I got hooked on eye creams in general. It does help tremendously with fine lines. Now, I don’t know how well this cream does on deep wrinkles, but if you’re between the ages of 25-40, then this is a good cream to use. I know that it helped prevent any lines to appear and any ones I did have, they magically disappeared after about six weeks or so. I only used the cream once a day, before going to sleep since I’m not a fan of using creams during the day.

Price: $39

Where to Buy It: Sephora, Ulta, or Amazon

By: Azzurra Nox

Mythology Mashup – A Review of Lost Gods by Brom

lost gods

Brom was introduced to me by Plucker one cold day in Denver. A combination of the altitude, wind and my need to enter every book store I pass drove me into the large Barnes and Noble where I happened upon an illustrated book. It was an amazing story that I quickly finished. Fast forward almost a decade later and the amazing author/illustrator released a new novel.

Lost Gods tells the tale of Chet, a man who has caused more than his fair share of trouble. However, he swears to change for the better when he proposes to his young, pregnant girlfriend. They travel to a safe haven to start a new life but end up falling into the trap of an ancient evil. Chet travels through the Underworld in order to find the man who holds the key to save his love and their daughter.

When I first read the premise for this book, I was a bit apprehensive. The plot seemed eerily similar to the Greek tale of Orpheous, who ventures through the underworld in an attempt to bring back his wife Eurydice. However, I am happy I gave Lost Gods a chance. There are some familiar elements to the story, but only because Brom’s weaves a tale containing elements from various belief systems. Fallen angels, witches, “One gods” and old gods battle for unclaimed souls that have made their way to Purgatory. Yet, this is not your run of the mill Aligheri underworld. A civil war is brewing amongst the deities and in this gritty fantastical land and most of the souls have picked sides. Vendors peddle their wares of weapons and drugs while the lost amble through trying to find their wave.

This tale is engaging and although there were a few weaker moments that might have been better (the humans were underdeveloped and conveniently placed albeit unexplained characters resolved tricky situations) it is still an interesting journey of a read. Also, it would not be a Brom novel if it did not contain a few pages of his magnificent artwork. The illustrations of the gods, lords, demons and other characters does not disappoint.

Lost Gods is the type of novel that will leave you spellbound.

By: Phoebe Jane

Simple Pin-Up Eye-Makeup!

looking down

The Pin-Up look is nothing new, as it was all the rage during the 1940’s-1950’s as it was popularized by icons such as Marilyn Monroe. In modern times, Dita Von Teese has been the one to bring the look back, and recently Lana Del Rey.

This look can be worn by anyone. It’s universally flattering for any skin type, age, or ethnicity. Not to mention that it’s quite simple once you learn the basics.

For this tutorial, I didn’t use the signature red lipstick that is best known for complimenting the Pin-Up eye-makeup. Personally, I think that any lip colour can be used with this look, as the eye-makeup isn’t too outrageous. So you can either dress the look up by using a bold red or tone it down by choosing a nude or rose hue instead.

Products*:

Smashbox Photo Finish Foundation Primer

Maybelline Instant Age Rewind Eraser Dark Circles in Light

Soap & Glory One Heck of a Blot Translucent Powder

Urban Decay Eyeshadow Primer Potion Original

Revlon Colorstay Liquid Eye Pen Classic in Blackest Black

Wet N’ Wild Eyeshadow in Creme Brullee (all over eye area)

Smashbox Eyeshadow in Grounded (in crease)

Smashbox Eyeshadow in Canyon (along lower lash line & brows)

Tart Blush in Paaarty

Hard Candy Eye-Def Metallic Eyeshadow in What Sandy Says Goes

L’Oreal Voluminous Superstar in Blackest Black

Lancome Le Crayon Khol in Blanc

Step One:

Use Smashbox’s Photo Finish Foundation Primer to prep your under-eye area before you use the concealer of your choice (currently I’m in love with Maybelline’s Instant Age Rewind Eraser in Light, as it covers up my dark circles in one easy swoop!). To set the concealer, I patted some of Soap & Glory’s translucent powder under my eyes and over the rest of my face.

Step Two:

Use a dime size of Urban Decay’s Eyeshadow Primer Potion (or any primer of your choice, to really keep your eye-makeup going for hours without any smudges!). Once you’ve done that, pack a bit of Wet N’ Wild’s eye-shadow in Creme Brullee with a brush and pat all over your lid and up to your brow bone.

Step Three:

Using a blending brush, place Smashbox’s Eyeshadow in Grounded in the crease, and blend till the shadow is seamless. Take a liner brush, and place a small amount on it and line your lower lashes using Smashbox’s Eyeshadow in Canyon.

Step Four:

Line your eyes using a liquid liner (I use Revlon’s Colorstay Liquid Eye Pen in Blackest Black). I did a classic cat-eye. You can either make your cat-eye simple as I did, or more dramatic by extending it further up.

Step Five:

To add a bit of a glam edge, I dusted a bit of Hard Candy’s Eye-Def Metallic Eyeshadow in what Sandy Says Goes, only on the lids. You can use any metallic or frosty gold shade.

Step Six:

Using a spooley brush out your eyebrows, and with a liner brush you can make your brows a bit bolder by using a shadow that’s slightly darker than your hair colour. I used Smashbox’s eyeshadow in Canyon. But depending on your hair color, you may choose another colour that best suits you.

Step Seven:

To make your eyes really pop, line the inside of your eyes with a white eyeliner (I used Lancome’s Le Crayon in Blanc). This trick makes your eyes appear bigger. Finish off the look my curling your lashes with an eyelash curler, and coat your lashes with primer. Wait ten seconds and then use two coats of black mascara. I used L’Oreal’s Voluminous Superstar in Blackest Black mascara, because it comes with a primer on one end, and mascara on the other end. Basically for about $9 you get two products in one! Win-win!

Step Eight:

Add a little colour to your cheeks with the blush of your choice (either a peach or pink hue). I went with Tart’s Blush in Paaarty. It’s simple but not too overwhelming.

glam eye left2

glam eye left open

Now go out and show off your look! This can be worn for any occasion or time of day. Simply change your lip shade and you can either turn this look into a day-time look or amp it up for an evening date night look!

smiling

*Products used for this tutorial were purchased by the writer.

By: Azzurra Nox

Chris Cornell: Black Hole Sun – When the Darkness Swallows You

Many people were surprised this morning to wake up to the news of the death of Chris Cornell, frontman of rock bands Soundgarden and Audioslave. He was also known for being a member of Temple of Dog, a tribute band dedicated to his late friend Andrew Wood who died of Heroin overdose.

Like, Nirvana, Soundgarden were one of the most popular bands to come out of Seattle in the late 90’s, carrying the torch for the grunge movement. But apart from having the staple grunge growl, Chris was known for his near four octave vocal range and being a prolific songwriter.

His love for music began during his teenage years, when he found a box of Beatles records during a time he was really depressed. He rose to prominence with his band Soundgarden, and gained international recognition with their sophomore album Superunknown, that featured singles Black Hole Sun and Spoonman, which both won Grammy Awards. Superunknown is listed #336 on Rolling Stone magazine’s list of 500 Greatest Albums of all time, while VH1 listed Black Hole Sun as #25 on the Top 100 Greatest Songs of the 90’s.

When Zack de La Rocha left Rage Against the Machine, Chris Cornell was asked to join the band, which soon became Audioslave. Apart from being the frontman for two bands, he was also known for his solo work, especially the song You Know My Name, the song written for the Bond film Casino Royale. His most recent songwriting endeavor was the charity single The Promise written for the ending credits for the movie of the same name about the Armenian genocide.

Chris was touring with his original band, Soundgarden when he committed suicide by hanging himself in his hotel room after a show in Detroit. Although this may have come as a shock to many, perhaps the darkness the singer experienced as a teen may have resurfaced again. Or maybe, like the ancient Greeks, he wished to have a most glorious death, meaning to die right after experiencing one of his best days because who wouldn’t want to end it on a high? The truth is, in these circumstances, we never know why someone decides to take their own life. But one thing is certain, too often the music world is plagued by the darkness that consumes their artists.

But after all that is said and done, at least we’re left with the music to remember these tortured artists by. And I like to believe that maybe they have found some peace in an after world that burns a little brighter than the one they left behind.

If you or anyone you know are feeling suicidal you can seek help at American Foundation for Suicide Prevention or Suicide Prevention Lifelife. You are not alone.

By: Azzurra Nox

Review: Essie Ballet Nudes Gel Couture

essie

Essie is a staple nail varnish brand for fashionistas and manicurists. I’ve enjoyed several of their colours from their normal varnish line, but decided to give the Gel Couture a spin. Usually I use Julep varnishes as they can last up to two weeks for me with barely any chipping. This new Essie gel-polish line promises a chip-free manicure for 14-days without the use of the LED or UV light (which is a bonus since traditional gel-manicures can be incredibly damaging to your nails).

The Essie Gel Couture is a two-step gel manicure that one can easily apply by themselves. I chose the colour Hold the Position. I usually go for various shades of red, but since it’s Spring, I decided to step outside of my usual colour scheme and go for something unconventional to my signature nail look.

Before I applied the nail varnish (Step One-the coloured bottle) I had washed my hands and buffed my nails. After that, I applied three coats of Step One nail varnish (because I felt the colour was a little too light and wanted it to really POP, but you can go with two coats without a problem). Afterwards, I applied one coat of Step Two (the clear top coat). I waited about 30 minutes for it to dry, but didn’t do anything too taxing using my hands for about an hour (just to be sure) so that the varnish could set.

This is the varnish after having been applied:

nails2

This is the varnish after 15-days of application:

nails3

As you can see, the varnish didn’t chip too terribly and the colour is still somewhat shiny and vibrant.

Verdict: I’m going to have to give this varnish 5+stars. I’m really happy with the length it’s stayed on without chipping and the application was rather simple. Not only, it gives you the shine of a true gel-manicure without the damaging effects of a real one. And taking the varnish off is simple, all you need is any

Retail: $11.50 per bottle (and since this is a two-step deal that’s going to be $23, which can seem pretty pricey, but since it truly stays on for 14-days I think it’s worth it).

You can purchase the varnish at various beauty retailers or just go to Ulta Beauty online and find your fave colour!

By: Azzurra Nox

Five Morning Rituals That Will Kick-Start Your Day!

For many of us, waking up early in the morning is a must. But if you’re not an early bird (as myself), waking up early can truly seem torturous. How can you alleviate this problem or at least make those early morning wake-up calls seem less dreadful? Here are a few of my morning rituals that help me jump-start my morning and be ready for the day.

Choose a Pleasant Alarm to Wake-Up To

I don’t know about you, but I’ve always found that being utterly startled out of sleep already puts me in a foul mood before I even set foot out of bed. Throughout the years I’ve found that being slowly awakened to a pleasant sound that gently lulls me out of sleep works wonders. I’ve been waking up to The Cure’s Just Like Heaven for years now. There’s something about Robert Smith’s dreamy voice and the uplifting spirit of this song that somehow makes me feel like my day is going to be awesome. Choose a song that makes you feel good or even a relaxing instrumental and start your day with some positive vibes!

Cup of Tea

I’m a tea lover, and if there’s one thing that will put me in a bad mood first thing in the morning is if I have awful tea (which also makes me a tea snob). I usually favour English Breakfast or Darjeeling Tea for the mornings. There’s something about the aroma and the comforting warmness of it that makes me feel like I’m being cuddled up in a snuggly blanket. Some of my favourite tea brands are: Twinings, Ashby, Mighty Leaf Tea, and . If you’re more of a coffee person, then go ahead and have that. But something about drinking a hot drink will soothe any morning jitters and get you prepared for the long day ahead.

7-Minute Reading

I know some people love to read the morning news, and that’s good if that’s what you like to do. I usually try to avoid being bombarded by the news first thing in the morning, mostly because a good portion of the news if always somewhat depressing. Instead, I try to wake up my brain with some leisure reading. Usually it may be a magazine article or simply reading a few pages of whatever book I’m currently reading. Whatever you choose doesn’t matter as long as it helps you motivate yourself to wake up.

7-Minute Workout

I’m not the best person when it comes to exercise (at least in the formal going to the gym-sort), but I’ve found that doing this simple exercise routine 7-Minute Morning Workout In Pyjamas by Joanna Soh is the best way to get your blood flowing and shake off the morning blues. This exercise is simple and doesn’t take too much time out of your morning routine. If anything, it helps you work off that extra glass wine or scoop of ice cream you had before going to sleep the night before. It’s also fool-proof enough that even hungover or sleep deprived you can manage to do these easy steps. In just seven minutes you’re able to loosen your muscles and get your heart rate going. And don’t worry if you work up a bit of a sweat, just jump into the shower afterwards!

Lemon Water

This is simple! Just take a glass of hot water and spritz some lemon juice (or add a slice of lemon) to the water and drink this either before your morning coffee or tea, or even after. This Lemon Water is an excellent source of Vitamin C (much needed during flu-season!) and an amazing way to rid your body of unwanted toxins. Not only that, lemon aids in reducing pain in the body and any inflammation in joints. Not to mention that it tastes delicious!

These are just some of my morning rituals. Leave some of yours in the comments below!


Lemon Water image taken from eblogfa.com

By: Azzurra Nox

Make Pesto Like A True Italian! Easy Recipe!

Many of you may not know, but I’m half Italian and grew up living in various Italian cities. For this reason, I’m always hesitant to dine out at Italian restaurants in America, because it’s rarely anything remotely close to what the original recipe really is. I always feel bad having to break the news to Americans that their most coveted Italian dish (Chicken Alfredo) is merely an American concoction that doesn’t exist in Italy.

When it comes to pesto, the secret is in the preparation. If you’ve ever actually been to Italy and had a chance to taste the pesto there, you will notice right away that it’s vastly different from the Americanized counterpart you find here in the U.S. at restaurants or sold in jars at stores. First of all, the real meaning of “pesto” in Italian is to “grind/smash.” That means in the original Italian recipe you DO NOT use a food processor or hand blender to get the ingredients to become a paste. Rather, you place all the ingredients in a mortar bowl and grind them using a pestle (see photo for example). This method requires you to manually grind all the ingredients together till it becomes a texturized paste.

pestogrinder

This may take you between 20-25 mins. I know many of us lead very busy lives and may find this takes too long and wish to skip this step and use a food processor, but if you truly want to experience an authentic Italian pesto, you must take the long way! The beauty of this though is, that you can make extra and freeze what you won’t be using, to be consumed at a later date. So pretty much it’s a far more invigorating and delicious meal prep trick!

Ingredients:

1 Large bunch of basil leaves (about 30 leaves washed & dried)

1-2 Tablespoons of Raw Pine Nuts (I love pine nuts so usually go with 2)

3 Medium cloves of garlic

2 Tablespoon of freshly grated Parmigiano Reggiano cheese

2 Tablespoon of freshly grated Peccorino Romano cheese

3 Tablespoons of extra-virgin olive oil

A pinch of salt

Directions:

Begin by chopping up the garlic cloves in four squares and cutting the basil leaves in half (if they’re too large). Once you’re done with this, place both of them in a mortar dish and using the pestle begin to grind and smash them. Do this until they’re completely minced. At this point, add the pine nuts (you may wish to chop the pine nuts if you want to speed up the process first) and using the pestle, mince them along with the first two ingredients. Now you add half of the Parmigiano Reggiano cheese to the mortar and grind and then add the other half. Repeat these steps for the Peccorino Romano cheese as well. Using the pestle, grind till all the ingredients are minced in a paste-like manner. Once you’re satisfied with the consistency, then you add the olive oil and salt to the mortar and using a teaspoon stir all the ingredients together. And you’re done!

Depending on how much pesto you use, this amount can be used for up to 3 dishes of pasta.

This is a very nutritious and delicious recipe that it’s hard not to love!

You can use any kind of pasta for pesto, below I chose to make it with orecchiette pasta because they’re one of my faves, but you can also use spaghetti or zitti if you prefer!

pesto

Buon Appetito!

By: Azzurra Nox

The Best Green Smoothie for Amazing Skin & Energy Boost!

With Spring in full swing, at times appetite decreases and keeping hydrated is a must! Rising temperatures and humidity do a number on your skin during the Spring and Summer months, so how can you combat both of those things in one easy step?

THE SOLUTION: Green Smoothie!

I’ll be the first to admit that I’m not a huge fan of smoothies or green smoothies in general (something about the consistency and taste), but here is a quick recipe that isn’t necessarily grainy and quite tasty! Oh, and it combats both hunger and thirst while providing enough vital nutrients and vitamins to help keep your skin looking its best even when it’s sweltering!

green smoothie

INGREDIENTS:

¾ cup Almond Milk
¾ cup Coconut Water
½ cup chopped Kale
½ cup baby Spinach
1 medium sized Apple (chopped)
¼ Avocado
Half a Banana
1-2 Tablespoons of Soy Protein Powder
1 Tablespoon of Chia Seeds

Blend the following ingredients on high speed for about 30-40 seconds, and you’ll be on the road to better skin and an instant energy boost! Basically, a win-win on all accounts. 

Let me know if you try this and how you like it! Enjoy!

By: Azzurra Nox


Simple Spring Makeup Look!

Glamorous looks are gorgeous, but not always doable when you haven’t got lots of time to spend hours applying makeup. I usually prefer to use less products as possible and try to keep my look simple but never drab!

These are the products* I used to achieve this look. You don’t have to use the same products as me, and can opt similar looking ones, but these are the ones I reached for to create the look below:

Products:

Smashbox Photo Finish Foundation Primer

Maybelline Instant Age Rewind Eraser Dark Circles in Light

LunatiCK Cosmetic Labs High Definition Microfinish Pressed Powder

Urban Decay Eyeshadow Primer Potion Original

Revlon Colorstay Liquid Eye Pen Classic in Blackest Black

L’Oreal Voluminous Superstar in Blackest Black

From Lancome’s Auda[city] in Paris Palette:

Exhibition Eyeshadow (on lid)

Kitten Heel Eyeshadow (on lid)

Smashbox Matte Eyeshadow:

Grounded (in crease)

Canyon (along lower lash line & brows)

Urban Decay Eyeshadow in Skimp (on brow bone)

Lancome Le Crayon Khol in Blanc

Jeffree Star Velour Liquid Lipstick in I’m Shook

Urban Decay Afterglow Powder Blush in Score

eyeeye2

Step One:

Use Smashbox’s Photo Finish Foundation Primer below your eyes, as a way to create a smooth surface for your concealer to go on (this helps eliminate creases!). I’m somewhat picky when it comes to concealers and always opt for liquid formulas over sticks. I placed Maybelline’s Instant Age Rewind Eraser Dark Circles in Light beneath my eyes to conceal my dark circles and use a beauty blender to blend it out. I then set the concealer using LunatiCK’s. Cosmetic Labs High Definition Microfinish Pressed Powder.

Step Two:

Swipe Urban Decay’s Eyeshadow Primer Potion Original upon your lid (or any other eyeshadow primer that you prefer). This will help lock in the eyeshadow that you’re going to be placing on top, as well as having the shadow not face throughout the day.

Step Three:

Swipe Lancome’s Eyeshadow in Exhibition on the lid. This is a matte pink and will help keep the look from getting too sparkly. Then place Lancome’s Eyeshadow in Kitten Heel on top, and blend the two colors till the matte pink and frosty peach become a pretty muted pink hue.

Step Four:

Using a blending brush, place Smashbox’s Matte Eyeshadow in Grounded in your crease and blend, blend, blend!

Step Five:

Line your lower lashes using Smashbox’s Matte Eyeshadow in Canyon. I often find that using a pencil liner for the lower lashes to be too harsh and accentuates fine lines. A shadow liner is far more forgiving in that respect.

Step Six:

Line your upper lid using Revlon Colorstay Liquid Eye Pen Classic in Blackest Black. You can either do a simple liner look or cat-eye at this point, whatever strikes your fancy! I find that Revlon’s liner is one of the best for being fool-proof and cost-effective.

Step Seven:

Using a slanted brush, take Smashbox’s Matte Eyeshadow in Canyon to fill your brows (if you’re light haired as myself), if not choose an eyeshadow that best suits your hair color.

Step Eight:

Take Urban Decay’s Eyeshadow in Skimp and place it upon your brow bone. This shade is slightly satin so it gives a bit of a sheen like a highlighter. Then use Lancome’s Le Crayon Khol in Blanc to line the inside of your lower lash so that your eye appears bigger rather than smaller (as it would using a black liner).

Step Nine:

Take a lash curler and carefully curl your lashes. Then take L’Oreal’s Voluminous Superstar in Blackest Black, and first use the mascara primer portion of the wand and let it sit for about 15 seconds. Then using the mascara portion of the wand apply two coats of mascara, and a light coat on your lower lahes. The reason why I love this mascara so much is because you get two products for the price of one (primer & mascara)!

Step Ten:

Lightly line your lips using Lancome’s Le Crayon Khol in Blanc and rub it still the line is barely visible. Use the line to help guide you as your apply Jeffree Star’s Velour Liquid Lipstick in I’m Shook. Tip: Use a THIN coat when applying a liquid lipstick as a thicker coat will weigh down your look and appear too made up. Finish the look by applying a light dusting of Urban Decay’s Afterglow Powder Blush in Score on the apple of your cheeks!

lips

All done! Now you’re ready to take on the day with a chic and fresh look!

makeup

Amount of time to create this look: Approx. 25 mins.

*All products used in this tutorial were bought by the writer.

By: Azzurra Nox

Say Farewell to your Acne FOREVER!

Acne can be a very serious problem for many men and women. Not only is it painful but it can be very damaging to your self-esteem. And yet, acne is no longer a problem that’s only debilitating teenagers around the world, but rather more and more adults everyday are being affected by this skin condition. 50 million, to be exact.

Now, I’m not a dermatologist, and I haven’t suffered from severe adult acne as some have, but I’ve had to deal with some painful cystic acne in which nothing seemed to cure. And apparently dermatologists were just as clueless, offering to prescribe one different acne cream or wash after another with no real significant change.

Being someone who’s always avid to learn, I decided that maybe I should try to find the perfect cure to eradicate this problem. After all, a whole population of an island on Papua New Guinea have never suffered from acne in their lives. This made me think about what did they have going for them?

First of all, throughout my extensive research I’ve learned one major fact, that acne is a problem that cripples mostly the Western World (poor eating habits and stress being the major issues).

I know dermatologists have been saying for years that they don’t know WHAT causes acne, but I decided to take matters into my own hands and figure out exactly what is happening to our skins.

The major culprit is P. acnes (a bacteria that colonizes the skin whether or not you have acne) and grows rampant with the help of sebum (hence why people with oily skin or combination skin are the ones who majorly suffer from this skin condition). Hormones also play a huge role, creating an overabundance of sebum (thus making your skin fertile for acne to flourish).

The issue is, how can we eradicate the problem? I turned to science as a way to solve it. What I learned was that a lot of the inflammation that causes acne begins in the stomach and that the common denominator in crushing acne is Vitamin A. So I used that knowledge to test drive the five steps that have kept me acne-free for two years.

skin

5 Proven Steps to Better Skin

Vitamin A. This vitamin makes your skin virtually hostile towards P. acnes by keeping your levels of sebum very low. There’s a reason why dermatologists prescribe Acutane to acne sufferers, and it’s because it’s pretty much overdosing on Vitamin A. Now, there’s two ways you can obtain more of this vitamin (through food such as a chicken livers, which you’d only need to eat it once a week, as Vitamin A is a fat soluble vitamin, meaning it’ll stayed stored in your liver till your body consumes it) or you can take Vitamin A supplements (which anything higher than 25,000IU daily dosage could be potentially harmful or even fatal, which is why if you’re planning on taking supplements that you see your doctor first to see what dosage is best for you). I DO NOT recommend to self-medicate because this isn’t a water soluble vitamin, so take with caution.

Rose Water Toner. Rose water helps soothes inflamed skin, and nothing causes acne-prone skin to breakout or get worse than using toners that are alcohol based (they’re too drying and hence will have your body replace even more sebum, creating a vicious cycle). There’s many to choose from on the market, but my personal go-to is Alteya Organic Bulgarian Rose Water (from New Rose Harvest). You can order it from Amazon and it retails for $15.94 (250-ml/8.5-fl. oz.).

Benzoyl Peroxide. This works because it helps kill the P. acnes that’s harvesting on your skin. Usually it takes about 6-12 weeks for you to start seeing a difference, so consistence is key. I’ve tried out many but what has really worked for me is Neutrogena’s Rapid Clear Stubborn Acne Spot Gel. It’s got 10% Benzoyl Peroxide (most of the creams out there have only 5%) and it really helps with keeping my skin clear. You can find it on Amazon or your local Ulta, Walgreens, Rite-Aid, or CVS and it usually retails for $6.50 (1-fl. oz.).

Brewer’s Yeast. Now, one of the major culprits that causes acne is your digestive tract being out of whack. Somehow, inflammation in your gut corresponds with inflammation on your skin. One of the reasons why that population in Papua New Guinea doesn’t suffer from acne is because they eat a plant-based diet, low sugar, and no processed foods. But some people even if they were to do all that, will still have gut issues because of stress. Enter Brewer’s Yeast that’s packed with all the B-vitamins essential for healthy skin (Thiamin Vitamin B1, Riboflavin Vitamin B2, Niacin Vitamin B3, Pantothenic acid Vitamin B5, and Pyridoxine Vitamin B6). It’s also got the good bacteria that makes your gut happy – Probiotics. Now you can take it in powder form (which is absolutely disgusting but does the trick) or you can find it in capsule form. I recommend Now’s Brewer’s Yeast, retailing for $10.25 (200-tablets) on Amazon.

Vitamin C Serum. Vitamin C is essential for collagen and cell turn over, and with skin that’s constantly inflamed, it helps dry out the P. acnes without causing it harm. I always put this on after having applied a thin layer of Neutrogena’s Spot Cream (see #3). I especially love Isabis Formulae’s Vitamin C serum because it’s also packed with Vitamin A & E which somehow helps keep spots at bay while leaving your skin feeling supple and glowing (this serum is so lightweight that you can also apply it during the day). It currently retails for $25.97 (30-ml/1-fl. oz.) on Amazon. A little goes a long way. One bottle usually lasts me between 3-4 months (I use it once a day at night).

*In conjunction with these steps you must also follow a diet that’s extremely low on dairy intake, high in leafy greens and water, and no processed foods or exceeding more than three teaspoons of sugar a day.

By: Azzurra Nox