Review: L’Oreal Infallible Full Wear Concealer

IMG_1368l

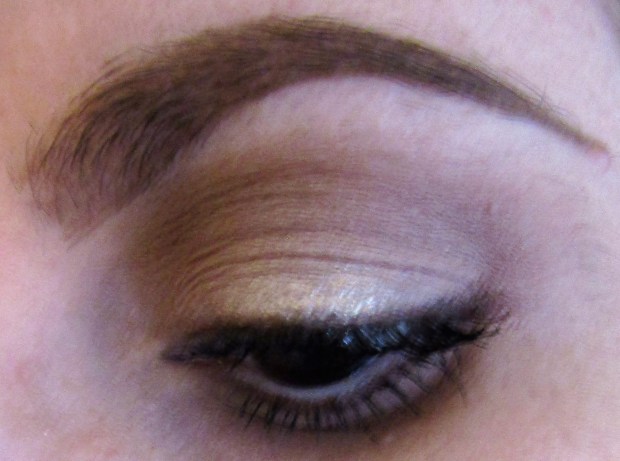
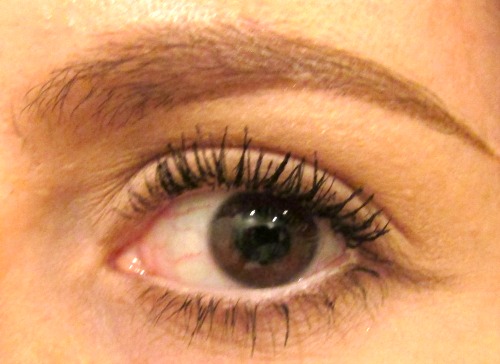
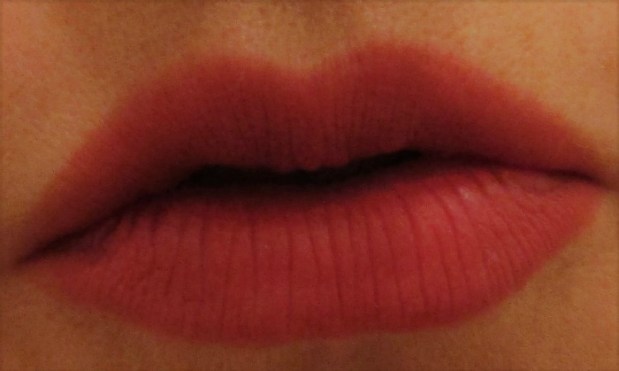
When it comes to concealer I usually don’t stray away from my long-trusted Lancome waterproof one that I’ve been using faithfully since 2011. Now, being someone who started to wear concealer at the age of 13 (ironically not to conceal blemishes but rather to finally find a way to eliminate my hereditary dark circles, the bane of my existence), you better bet that I’ve tried all kinds concealers over the years. I’ve attempted stick formulas, powder, liquid…you name it, I’ve tried it! So when I first saw this at Target, I wasn’t sure if I wanted to try it, because time and time again, I’ve always returned to my trusted Lancome concealer. But I figured for the price, I might as well give it a try.

What It Is: Full coverage concealer

Distinguishing Factors: Waterproof & long-lasting

Verdict: First of all, this L’Oreal range tried to be inclusive, providing 25 shades (although it still kinda seems like 15 of the shades are for different variations of white). I, of course, was thrilled to see that their version of Porcelain was actually my shade of pale (cause when you’re ghost white as myself almost any foundation or concealer always comes off as either too pink or too yellow). This one, luckily was closer to my skin tone, albeit not a perfect match as my Lancome shade (but maybe it just means I need to try another shade of pale they have to offer).

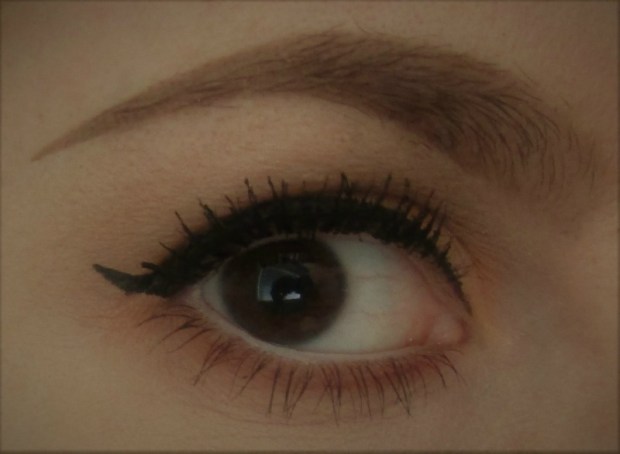
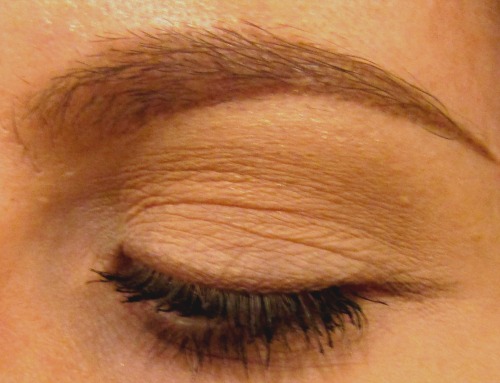
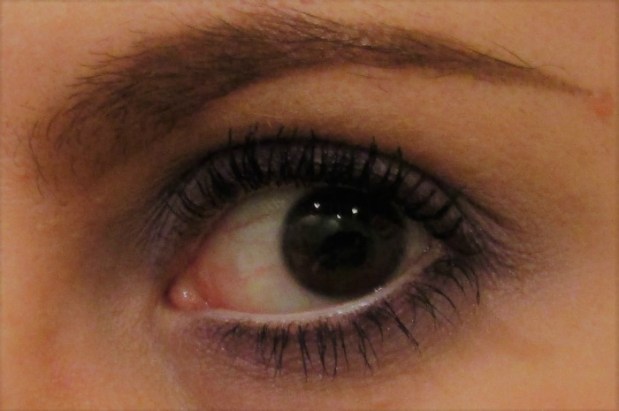
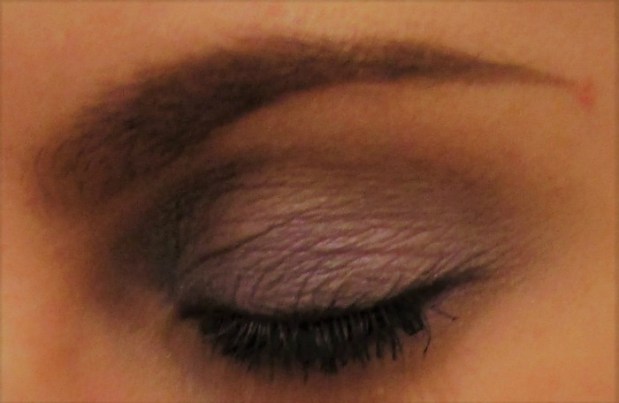
One thing that I noticed right away though when I applied this concealer is that a little goes a LOOOONG way, meaning that the usual amount I tend to use with other brands ended up being TOO much for this product as it seems that with one tiny swipe it magically conceals everything! Yes, this product is hella thick, but it doesn’t feel heavy or cakey, and it DOES NOT CREASE. Nor is it drying. I blended the product out using a damp tiny Beauty Blender and it seems to be the best way to apply it. I set it using Makeup Forever’s foundation powder.

This is AMAZING…it instantly conceals and brightens in less than a second! Dare I say that it’s better than Tarte’s Shape Tape? I THINK IT IS. I highly recommend this product and at the price, it’s at, it’s A STEAL! So snatch a tube for yourself and next time you see yourself in the mirror, you might very well utter, “Who dis?”

Price: 12.99

Where To Buy It: L’Oreal website

White and Pink Strikeout Cosmetics Beauty Logo

DID YOU ENJOY WHAT YOU JUST READ? IF YES, THEN SUBSCRIBE TO THE BLOG, GIVE THE POST A LIKE, OR LEAVE A COMMENT! NEW POSTS ARE UP EVERY TUESDAY & THURSDAY!

Review: L’Oreal Voluminous Superstar X Fiber Mascara

fibermascara

It’s no secret that one of my longest standing go-to mascara favourites is L’Oreal Voluminous Mascara, so when I noticed that L’Oreal came out with a new and improved version of it, I couldn’t wait to check it out.

What It Is: Super-Volumized, Super-Extended, X-Treme Superstar Lashes

What It Does: The Black Primer portion of the mascara delivers extreme volume and depth, whilst the Fiber Infused Mascara portion create extreme length.

Distinguishing Factors: Primer and mascara. Primer creates a black lash base whilst the fiber mascara helps with extending the length of your lashes.

Verdict: What I love about this mascara is that you have both primer and mascara in one handy wand! The primer that comes with mascara is black, rather than white, which helps cut down on the waiting time (cause I usually wait for the white primers to dry up a little before adding the mascara). This black primer is created so that there is no wait time, and it helps prepare the lashes for the fiber mascara. I’ll be honest, I wasn’t sure how I’d feel about the fiber mascara formula. Fiber mascara means that there are little tiny fibers in the mascara that attach to the lashes and thus helps with creating a lengthening look to each individual lash. This mascara DOES deliver in helping with length if that’s your concern but it also helps with volume if that’s what you seek. I also love that this mascara was neither clumpy nor did it ever feel heavy. Bonus, there’s no flaking, smudging, or fall-out all day! Instead, what you do get is defined, extra-voluminous, and long lashes without the hassle of falsies or extensions! A definite win/win in my book.

Price: $10.99

Where To Buy It: https://www.lorealparisusa.com

IMG_0900

IMG_0901

By: Azzurra Nox


Review: L’Oreal Infallible Pro Matte Liquid Lipstick

IMG_0733

What It Is: Highly Pigmented Liquid Matte Lipstick

Verdict: I bought this lipstick because I was looking for a matte liquid lipstick that was a blood red hue, and so I ended up getting the Roseblood shade out of this collection. I wasn’t sure what to expect since I haven’t been impressed with too many liquid lipsticks from other brands, except for Jeffree Star (my absolute favourite brand for liquid lipsticks). What I can say is that I’m pleasantly surprised by how amazing this product is! First of all, the colour is highly pigmented (albeit that you have to slick on about two layers of it since the first layer is more sheer than dark), but the best thing about this liquid lipstick is that it’s NOT drying AND it looks amazing (meaning it doesn’t play up the lines in your lips but rather comes out looking very smooth-looking an uniform). Bonus point: This lipstick doesn’t come off even after a serious makeout session.

Price: 9.99

Where To Buy It: CVS, Target, and www.lorealparisusa.com

IMG_0726

By: Azzurra Nox

Makeup Tutorial: Life is Peachy!

peachy

I’m a huge fan of peach hues when it comes to makeup, but finding the perfect shade of peach can be quite daunting! So when I saw that Colour Pop had a few shades of peach, I jumped right on it and ordered several shades. This look is quite simple, but at the same time very fresh and chic and I could see it being used for a day-time cocktail party or ya know, just glamming it up as you binge-watch American Gods cause ya gotta be one fancy beyotch as you stuff your face with Captain Crunch berries.

Base

As usual I prepped my undereye area with Smashbox’s Photofinish Primer, and although there may be other cool primers out there, I’m really happy with this one, so I’ll usually stick to what I love before I branch out to others. Now, I’ve been looking for a new concealer for months to BLOW ME AWAY, and seeing that Allure lauded Colour Pop’s concealer so much, I knew that I just HAD to try it. So I ended up getting Colour Pop’s No Filter Concealer in Fair 5. Well, let’s say that in photos, the concealer looked amazing, but in real-life not so much (can anyone say, crease-much?). By the end of the day I felt like Steven Tyler and his million wrinkles. Not cool.

I set everything with Makeup Forever’s Ultra HD Pressed Powder in Transluscent and used a pretty peachy hue blush from Clinique called Peach Pop (I believe this was a limited edition).

Using a tiny beauty blender I added some highlights to the tip of my nose, brow bone, and cheeks using L’Oreal’s True Match Lumi Liquid Glow Illuminator Prime & Highlight in C301 Ice Glace.

peacheye

peacheye2

Eyes & Lips

For my brows, these days I’m sticking to Brow Wow Wow from Medusa’s Makeup. I just LOVE this so much, and the angular brush that Medusa’s Makeup sent me with this is absolute brush heaven.

For the lids, I applied Colour Pop’s Super Shock Shadow in Kennedy and placed Colour Pop’s Super Shock Shadow in Bandit in the crease and lower lash line, while applying Wet N’ Wild Creme Brullee eyeshadow along my brow bone. I used Revlon’s Colorstay Liquid Eye Pen in Black to make a simple winged liner. I then applied Clinique’s lash building primer after curling my lashes, and let the primer set for a few seconds before applying a generous amount of Clinique’s High Impact Mascara in Black to both my top and bottom lashes. To brighten up the look I lined my waterline with Lancome’s Khol Crayon in Blanc.

poplips

I finished off the look with Colour Pop’s Kathleen Lights’ collab Ultra Matte Lip in Alyssa. This shade is the perfect pinky nude that you simply need in your life right about M-E-O-W.

Let me know what you think of this look!

losangelesz

By: Azzurra Nox

Review: L’Oreal Voluminous Lash Paradise

lash

What It Is: Voluptuous volume and lengthening mascara

What Is Does: This mascara is designed to volumize and lengthening your lashes in a way that no other mascara has done before!

Distinguishing Factors: More than 200 bristles on the wand to truly grip and coat every single lash and a silky formula that makes lashes soft and voluptuous, never cakey or dry, brittle lashes!

Verdict: I’ve been wanting to try this mascara now for the past month. I’ve always been a fan of L’Oreal’s Voluminous mascara, and opted to get this mascara in Blackest Black. The brush truly helps with a smooth, even application and the formula is really soft like coating your lashes in silk. Like the other Voluminous mascaras in the series, this too delivered in volume and length. My lashes tripled in size and just looked crazily glamorous. I’ve applied two coats in the photos, and there are no fake lash inserts, it’s all the mascara’s magic! I truly recommend this mascara if you want beautiful, lush lashes!

Price: $9

Where To Buy It: Ulta, CVS, Amazon, Wal-Mart

lash_eye

lash_eye2

By: Azzurra Nox

Violent Violet Make-up Look!

Nowadays, it’s far more common that I’ll be sporting a neutral smokey look when it comes to eye-makeup. But when I was just a teenager, I LOVED bold purple shadows. I think one of the reasons why I stopped doing my eyes that way wasn’t because I didn’t enjoy the purple shadows anymore, but rather because in the coming years it has been difficult to find shades of violet that I actually like and suit me.

But recently I’ve found a violet shadow that I adore, and decided to start sporting the same makeup look I had when I was sixteen to see if I’d still love it today. Well, I probably wouldn’t wear it everyday now, but I do think it’s a pretty option every now and then.

violet3

Products*:

Notoriously Morbid Eyeshadow – Siren Song

Wet N’ Wild Eyeshadow – Creme Brullee

Urban Decay Eyeshadow – Anaheim

Urban Decay Eyeshadow – Romp

Urban Decay Eyeshadow – Blonde

L’Oreal Mascara Primer

L’Oreal Voluminous Mascara in Blackest Black

NYX Eyebrow Marker in Medium

Jeffree Star Liquid Lip Velour in Rose Matter

Urban Decay Glow Blush in Score

Smashbox Full Exposure Mascara in Black

Lancome Le Crayon Khol in Blanc

violet

Step One:

I distributed Notoriously Morbid’s loose shadow in Siren Song all over my lid. I really packed on the colour. Be sure to use an eyeshadow primer as that truly makes the colour POP. Usually I use Urban Decay’s Primer Potion, but I decided to get Wet n’ Wild eyeshadow primer a go and it works just as well at a fraction of the price!

Step Two:

To not overwhelm the purple, it’s best to use a neutral transition colour on the crease. I opted for Urban Decay’s Anaheim shade. I dusted it with a light hand using a blending brush. I then placed Wet N’ Wild’s Creme Brullee shade all over my brow bone and lightly dusted Urban Decay’s Blonde shade on my brow bone to highlight it.

Step Three:

I then used Urban Decay’s Romp shade (a deep purple) as my liner for upper and lower lashes. It’s an eyeshadow, but I often like to use shadows as liner when I’m trying to keep the look light and not product heavy. I then used Lancome’s Le Crayon Khol in Blanc on the inside of my lower lash line.

violet2

Step Four:

After curling my lashes with an eyelash curler, I used L’Oreal’s Primer to coat my lashes. I allowed ten seconds to dry before applying three coats of L’Oreal’s Voluminous Mascara in Blackest Black and one coat of Smashbox’s Full Exposure Mascara to my lower lashes. For my brows I used NYX’s Eyebrow Marker in Medium. This is hands-down the best and most lightweight eyebrow I’ve ever used! So kudos to NYX for making such a kick-ass product that is long-lasting and smudge free!

Step Five:

To complete the look I dusted Urban Decay’s Glow blush in Score and added Jeffree Star’s Liquid Velour Lipstick in Rose Matter to my lips.

lips

Now slip into something edgy and go out to show off your look! Let me know what your fave purple shadows are in the comments below!

*All products used for this look were purchased by the writer.

By: Azzurra Nox

Simple Pin-Up Eye-Makeup!

looking down

The Pin-Up look is nothing new, as it was all the rage during the 1940’s-1950’s as it was popularized by icons such as Marilyn Monroe. In modern times, Dita Von Teese has been the one to bring the look back, and recently Lana Del Rey.

This look can be worn by anyone. It’s universally flattering for any skin type, age, or ethnicity. Not to mention that it’s quite simple once you learn the basics.

For this tutorial, I didn’t use the signature red lipstick that is best known for complimenting the Pin-Up eye-makeup. Personally, I think that any lip colour can be used with this look, as the eye-makeup isn’t too outrageous. So you can either dress the look up by using a bold red or tone it down by choosing a nude or rose hue instead.

Products*:

Smashbox Photo Finish Foundation Primer

Maybelline Instant Age Rewind Eraser Dark Circles in Light

Soap & Glory One Heck of a Blot Translucent Powder

Urban Decay Eyeshadow Primer Potion Original

Revlon Colorstay Liquid Eye Pen Classic in Blackest Black

Wet N’ Wild Eyeshadow in Creme Brullee (all over eye area)

Smashbox Eyeshadow in Grounded (in crease)

Smashbox Eyeshadow in Canyon (along lower lash line & brows)

Tart Blush in Paaarty

Hard Candy Eye-Def Metallic Eyeshadow in What Sandy Says Goes

L’Oreal Voluminous Superstar in Blackest Black

Lancome Le Crayon Khol in Blanc

Step One:

Use Smashbox’s Photo Finish Foundation Primer to prep your under-eye area before you use the concealer of your choice (currently I’m in love with Maybelline’s Instant Age Rewind Eraser in Light, as it covers up my dark circles in one easy swoop!). To set the concealer, I patted some of Soap & Glory’s translucent powder under my eyes and over the rest of my face.

Step Two:

Use a dime size of Urban Decay’s Eyeshadow Primer Potion (or any primer of your choice, to really keep your eye-makeup going for hours without any smudges!). Once you’ve done that, pack a bit of Wet N’ Wild’s eye-shadow in Creme Brullee with a brush and pat all over your lid and up to your brow bone.

Step Three:

Using a blending brush, place Smashbox’s Eyeshadow in Grounded in the crease, and blend till the shadow is seamless. Take a liner brush, and place a small amount on it and line your lower lashes using Smashbox’s Eyeshadow in Canyon.

Step Four:

Line your eyes using a liquid liner (I use Revlon’s Colorstay Liquid Eye Pen in Blackest Black). I did a classic cat-eye. You can either make your cat-eye simple as I did, or more dramatic by extending it further up.

Step Five:

To add a bit of a glam edge, I dusted a bit of Hard Candy’s Eye-Def Metallic Eyeshadow in what Sandy Says Goes, only on the lids. You can use any metallic or frosty gold shade.

Step Six:

Using a spooley brush out your eyebrows, and with a liner brush you can make your brows a bit bolder by using a shadow that’s slightly darker than your hair colour. I used Smashbox’s eyeshadow in Canyon. But depending on your hair color, you may choose another colour that best suits you.

Step Seven:

To make your eyes really pop, line the inside of your eyes with a white eyeliner (I used Lancome’s Le Crayon in Blanc). This trick makes your eyes appear bigger. Finish off the look my curling your lashes with an eyelash curler, and coat your lashes with primer. Wait ten seconds and then use two coats of black mascara. I used L’Oreal’s Voluminous Superstar in Blackest Black mascara, because it comes with a primer on one end, and mascara on the other end. Basically for about $9 you get two products in one! Win-win!

Step Eight:

Add a little colour to your cheeks with the blush of your choice (either a peach or pink hue). I went with Tart’s Blush in Paaarty. It’s simple but not too overwhelming.

glam eye left2

glam eye left open

Now go out and show off your look! This can be worn for any occasion or time of day. Simply change your lip shade and you can either turn this look into a day-time look or amp it up for an evening date night look!

smiling

*Products used for this tutorial were purchased by the writer.

By: Azzurra Nox

Simple Spring Makeup Look!

Glamorous looks are gorgeous, but not always doable when you haven’t got lots of time to spend hours applying makeup. I usually prefer to use less products as possible and try to keep my look simple but never drab!

These are the products* I used to achieve this look. You don’t have to use the same products as me, and can opt similar looking ones, but these are the ones I reached for to create the look below:

Products:

Smashbox Photo Finish Foundation Primer

Maybelline Instant Age Rewind Eraser Dark Circles in Light

LunatiCK Cosmetic Labs High Definition Microfinish Pressed Powder

Urban Decay Eyeshadow Primer Potion Original

Revlon Colorstay Liquid Eye Pen Classic in Blackest Black

L’Oreal Voluminous Superstar in Blackest Black

From Lancome’s Auda[city] in Paris Palette:

Exhibition Eyeshadow (on lid)

Kitten Heel Eyeshadow (on lid)

Smashbox Matte Eyeshadow:

Grounded (in crease)

Canyon (along lower lash line & brows)

Urban Decay Eyeshadow in Skimp (on brow bone)

Lancome Le Crayon Khol in Blanc

Jeffree Star Velour Liquid Lipstick in I’m Shook

Urban Decay Afterglow Powder Blush in Score

eyeeye2

Step One:

Use Smashbox’s Photo Finish Foundation Primer below your eyes, as a way to create a smooth surface for your concealer to go on (this helps eliminate creases!). I’m somewhat picky when it comes to concealers and always opt for liquid formulas over sticks. I placed Maybelline’s Instant Age Rewind Eraser Dark Circles in Light beneath my eyes to conceal my dark circles and use a beauty blender to blend it out. I then set the concealer using LunatiCK’s. Cosmetic Labs High Definition Microfinish Pressed Powder.

Step Two:

Swipe Urban Decay’s Eyeshadow Primer Potion Original upon your lid (or any other eyeshadow primer that you prefer). This will help lock in the eyeshadow that you’re going to be placing on top, as well as having the shadow not face throughout the day.

Step Three:

Swipe Lancome’s Eyeshadow in Exhibition on the lid. This is a matte pink and will help keep the look from getting too sparkly. Then place Lancome’s Eyeshadow in Kitten Heel on top, and blend the two colors till the matte pink and frosty peach become a pretty muted pink hue.

Step Four:

Using a blending brush, place Smashbox’s Matte Eyeshadow in Grounded in your crease and blend, blend, blend!

Step Five:

Line your lower lashes using Smashbox’s Matte Eyeshadow in Canyon. I often find that using a pencil liner for the lower lashes to be too harsh and accentuates fine lines. A shadow liner is far more forgiving in that respect.

Step Six:

Line your upper lid using Revlon Colorstay Liquid Eye Pen Classic in Blackest Black. You can either do a simple liner look or cat-eye at this point, whatever strikes your fancy! I find that Revlon’s liner is one of the best for being fool-proof and cost-effective.

Step Seven:

Using a slanted brush, take Smashbox’s Matte Eyeshadow in Canyon to fill your brows (if you’re light haired as myself), if not choose an eyeshadow that best suits your hair color.

Step Eight:

Take Urban Decay’s Eyeshadow in Skimp and place it upon your brow bone. This shade is slightly satin so it gives a bit of a sheen like a highlighter. Then use Lancome’s Le Crayon Khol in Blanc to line the inside of your lower lash so that your eye appears bigger rather than smaller (as it would using a black liner).

Step Nine:

Take a lash curler and carefully curl your lashes. Then take L’Oreal’s Voluminous Superstar in Blackest Black, and first use the mascara primer portion of the wand and let it sit for about 15 seconds. Then using the mascara portion of the wand apply two coats of mascara, and a light coat on your lower lahes. The reason why I love this mascara so much is because you get two products for the price of one (primer & mascara)!

Step Ten:

Lightly line your lips using Lancome’s Le Crayon Khol in Blanc and rub it still the line is barely visible. Use the line to help guide you as your apply Jeffree Star’s Velour Liquid Lipstick in I’m Shook. Tip: Use a THIN coat when applying a liquid lipstick as a thicker coat will weigh down your look and appear too made up. Finish the look by applying a light dusting of Urban Decay’s Afterglow Powder Blush in Score on the apple of your cheeks!

lips

All done! Now you’re ready to take on the day with a chic and fresh look!

makeup

Amount of time to create this look: Approx. 25 mins.

*All products used in this tutorial were bought by the writer.

By: Azzurra Nox