
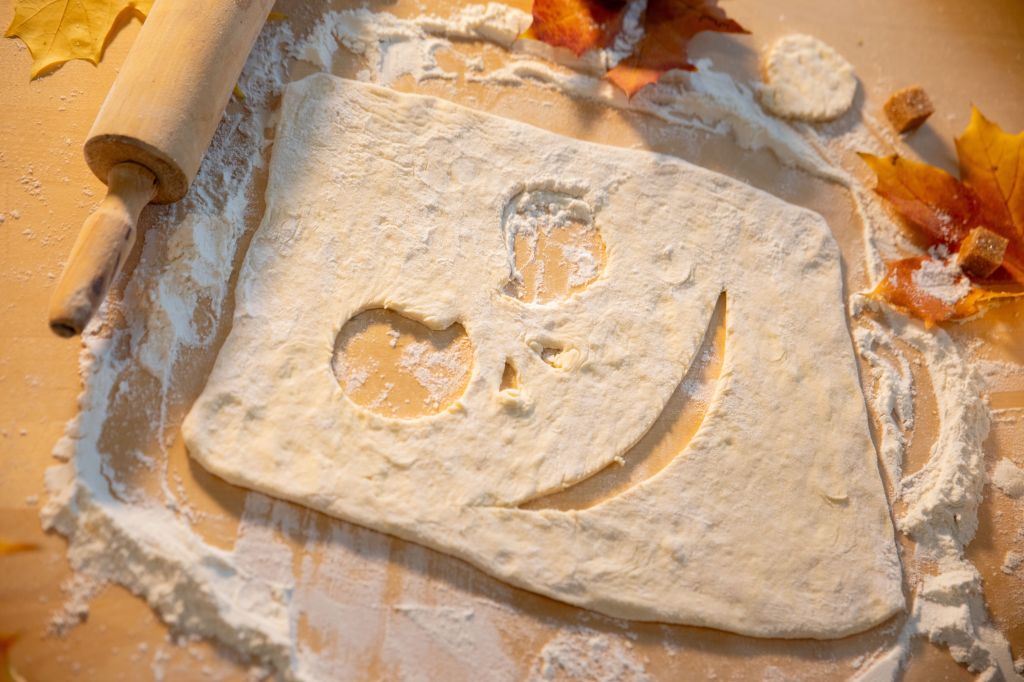
Spooky & Sweet! Easy Halloween Mummy Pizza Bites 🎃👻

Halloween is the perfect time to get creative in the kitchen! Whether you’re hosting a Halloween party, planning a spooky movie night, or looking for a fun after-school snack, these Halloween Mummy Pizza Bites are sure to be a hit. They’re cheesy, delicious, super easy to make, and almost too cute to eat!

With golden, crispy dough, gooey melted cheese, tasty pizza sauce, and little olive eyes, these mini mummies are the perfect combination of spooky and scrumptious.

🕸️ Why You’ll Love These Halloween Snacks

  • Easy to make: Just a few simple ingredients are all you need.
  • Kid-friendly fun: Little helpers can wrap the mummies and add their eyes.
  • Perfect for parties: They’re bite-sized, easy to serve, and guaranteed to bring Halloween spirit to the table.
  • Customizable: Add your favorite pizza toppings to make each mummy unique.

🧡 Ingredients You’ll Need

Here’s what you’ll need to create your spooky little snacks:

  • 1 can of refrigerated pizza dough or crescent roll dough
  • ½ cup pizza sauce
  • 1 cup shredded mozzarella cheese
  • ¼ cup sliced black olives
  • ½ teaspoon Italian seasoning (optional)
  • Cooking spray or a little olive oil

👻 How to Make Mummy Pizza Bites

Step 1: Preheat the Oven

Preheat your oven to 375°F (190°C). Lightly grease a baking sheet or line it with parchment paper.

Step 2: Prepare the Dough

Roll out the pizza dough and cut it into small rectangles or squares. Spoon a little pizza sauce onto each piece, leaving a small border around the edges.

Step 3: Add the Cheese

Sprinkle mozzarella cheese over the sauce. If you love extra flavor, add a pinch of Italian seasoning or a few tiny pieces of pepperoni.

Step 4: Wrap Your Mummies

Cut the remaining dough into thin strips. Lay the strips across each pizza bite in a crisscross pattern to create the look of mummy bandages. Leave a small gap near the top for the eyes.

Step 5: Bake Until Golden

Place the pizza bites on the prepared baking sheet and bake for about 10–15 minutes, or until the dough is cooked through and the cheese is melted. Baking time may vary depending on the dough and the size of your bites.

Step 6: Give Them Some Eyes!

Let the pizza bites cool slightly, then add two tiny pieces of sliced black olives to each mummy to create its spooky eyes.

Arrange them on a platter, and voilà! Your Halloween mummy pizza bites are ready to serve.

🦇 Fun Tips for Extra Halloween Magic

Make a spooky snack platter. Surround your mummy bites with carrot sticks, cucumber slices, and orange bell pepper strips for a colorful Halloween spread.

Try different toppings. Swap in mini pepperoni pieces, diced bell peppers, or your favorite pizza ingredients.

Create a monster collection. Use olives for mummy eyes, or make mini pizza pumpkins with orange cheese and tiny green pepper stems.

Turn snack time into a Halloween activity. Let everyone design their own mummy by choosing how to wrap the dough and where to place the eyes.

🎃 Serving Ideas for Your Halloween Party

Serve these adorable mummy bites warm alongside marinara sauce for dipping. Add a bowl of popcorn, some Halloween-themed fruit, and a spooky punch to create a festive snack table everyone will love.

They’re also great for school celebrations, family gatherings, or a Halloween movie marathon featuring your favorite spooky classics.

👻 Final Thoughts

Halloween food doesn’t have to be complicated to be memorable! These easy Mummy Pizza Bites prove that a few simple ingredients and a little imagination can turn an everyday snack into something wonderfully spooky.

They’re cheesy, fun to make, and perfect for sharing with family and friends. So grab your dough, gather your little monsters, and get ready to create a Halloween treat that’s sure to disappear faster than a ghost at midnight!

Happy Halloween, and happy snacking! 🎃🕷️🧡

DID YOU ENJOY WHAT YOU JUST READ? IF YES, THEN SUBSCRIBE TO THE BLOG, GIVE THE POST A LIKE, OR LEAVE A COMMENT! NEW POSTS ARE UP EVERY TUESDAY & THURSDAY!

🍓 The Easiest Strawberry Cheesecake Dessert for Thanksgiving (or Anytime You Want to Look Impressive)

Look, Thanksgiving is chaotic enough. The turkey is dry, someone forgot the rolls in the oven, and Cousin Janet has Opinions about everything. Dessert should be the easy part—and lucky for you, I’ve got the perfect no-stress, no-bake treat that tastes like you spent way more time on it than you actually did.

Introducing: No-Bake Strawberry Cheesecake Cups.
They’re adorable, delicious, and require about as much effort as deciding what to watch after dinner.


🍓 Why This Dessert Is a Holiday Hero

  • No oven needed. Bless.
  • Fast. You can make these while your family argues about which parade balloon was best this year.
  • Pretty enough for Instagram. You don’t even need a filter.
  • Individual servings = zero slicing drama. You’re welcome.

🍓 What You’ll Need

  • 1 block cream cheese, softened
  • 1 cup heavy cream (or Cool Whip if that’s more your speed)
  • ½ cup sugar (more or less depending on how sweet your berries are)
  • 1 teaspoon vanilla
  • 2 cups fresh strawberries, chopped
  • 1–2 tablespoons strawberry jam (optional, but soooo good)
  • Crushed graham crackers or vanilla wafers
  • Optional toppings: whipped cream, extra berries, a drizzle of jam, crushed cookies, mint leaf if you wanna be fancy

🍰 How to Make It (In No Time at All)

  1. Whip the cream until soft peaks form. (Or open the Cool Whip. Again: no shame.)
  2. In a separate bowl, mix cream cheese, sugar, and vanilla until it’s smooth and irresistible.
  3. Fold in the whipped cream until fluffy and cheesecake-y.
  4. Toss your chopped strawberries with a spoonful of strawberry jam for extra sweetness and gloss. (This step makes you look like a professional, trust me.)
  5. Now assemble:
    crushed cookies → cheesecake mixture → strawberries
    Repeat layers if you’re feeling extra.
  6. Top with whipped cream and more strawberries because life is short.

Chill for 30 minutes if you can wait—but honestly, they’re fantastic right away.


💡 Make It Your Own

  • Use crushed shortbread for a buttery base.
  • Add a splash of lemon juice for brightness.
  • Swirl in a little Nutella if you want to cause a family-wide obsession.
  • Mix berries: strawberry + blueberry = summer vibes in November.

⭐ Final Thoughts

These No-Bake Strawberry Cheesecake Cups are fast, fruity, and guaranteed to steal the Thanksgiving dessert spotlight—even next to a fancy pecan pie. They’re simple enough for a weeknight but stunning enough for the holiday table.

Prepare to be praised. Prepare to be asked for the recipe. Prepare to act humble even though you know this took you, like, 10 minutes.

Happy Thanksgiving—and happy dessert hacking. 🍓🥂

DID YOU ENJOY WHAT YOU JUST READ? IF YES, THEN SUBSCRIBE TO THE BLOG, GIVE THE POST A LIKE, OR LEAVE A COMMENT! NEW POSTS ARE UP EVERY TUESDAY & THURSDAY!

Recipe: Maple Glazed Brussel Sprouts

maple

Photo courtesy of hotdinnerhappyhome.blogspot.com

Happy Thanksgiving, Peeps!

Are you one of those people who never know what to bring to a Thanksgiving gathering? This year, bring something that is both a crowd pleaser and doesn’t pack on the calories. I actually made this dish for a Friendsgiving gathering and it wasn’t long before it was all gone! This recipe is super easy as it doesn’t have that many ingredients and once it’s put together, the oven does the rest of the work!

Ingredients:

1 – pound Brussels Sprouts, trimmed and cut in half

¼ cup extra virgin olive oil

3 Tablespoons Pure Maple Syrup

4 Slices bacon, cut into ½ inch pieces

½ Teaspoon Salt

¼ Teaspoon freshly ground Black Pepper

Prep Time: 10-minutes

Cook Time: 35-minutes

Directions:

Preheat oven to 350 degrees F (200 degrees C)

Place the Brussels Sprouts in a single layer into a baking dish (preferably glass).

Drizzle with olive oil and maple syrup, toss the sprouts to coat.

Sprinkle with bacon and season with salt and black pepper.

Roast in the preheated oven for about 35-minutes, or until the bacon is crispy and the sprouts are caramelized. Every so often, stir so they don’t get stuck or burned.

Calories:175 per 1-cup serving

White and Pink Strikeout Cosmetics Beauty Logo

DID YOU ENJOY WHAT YOU JUST READ? IF YES, THEN SUBSCRIBE TO THE BLOG, GIVE THE POST A LIKE, OR LEAVE A COMMENT! NEW POSTS ARE UP EVERY TUESDAY & THURSDAY

Recipe: Pumpkin Pie Parfait

pumpkin

Photo courtesy of weelicious.com

October is the month where we all put our summer clothes away and eagerly take out our sweaters, boots, and apply earth-toned lipstick to our lips, holding an infamous pumpkin spice latte in our hands. Nothing says Autumn like pumpkin and pumpkin spice. To celebrate Autumn’s arrival why not try out this super easy no-bake dessert? It’s one of my favourites and a total crowd pleaser.

Makes 6-cups

Ingredients:

1 ¾ Cups Cold Milk (you can substitute it with lactose-free milk or coconut milk if you prefer)

1 Box (4-serving size) Vanilla Instant Pudding

1 Cup Canned Pumpkin

½ teaspoon Pumpkin Spice

1 Package (8-oz.) cream cheese, softened

¾ Cup Powdered Sugar

1 ½ Cups Whipping Cream

1 Box of Keebler’s Sandies

½/ stick of butter (melted)

Directions:

In a medium bowl, stir milk and pudding mix with whisk for 2 minutes. Stir in pumpkin and pumpkin spice. Refrigerate until ready to assemble parfaits.

In a blender put in the Sandies till they’re blended to crumbs. Then take a medium bowl and mix the crumbs with the melted butter. Once the two ingredients are assembled, place these at the bottom of the cups.

Now take another medium bowl, beat cream cheese and powdered sugar with an electric mixer on low speed until blended smooth. In a chilled large bowl, beat heavy cream on high till the whipping cream stiff peaks form. Fold whipped cream into the cream cheese mixture.

In each of the 6 parfait glasses, spoon ¼ cup pumpkin pudding, top each with 6 tablespoons cream cheese mousse mixture. Repeat layers. Refrigerate for 2 hours or until serving time. Just before serving, top each parfait with a Sandies’ cookie.

002

DID YOU ENJOY WHAT YOU JUST READ? IF YES, THEN SUBSCRIBE TO THE BLOG, GIVE THE POST A LIKE, OR LEAVE A COMMENT! NEW POSTS ARE UP EVERY TUESDAY & THURSDAY!

White and Pink Strikeout Cosmetics Beauty Logo

Make Tiramisu like a True Italian! Easy Recipe to Enjoy & Wow Dinner Guests!

Tiramisu is one of Italy’s most famous desserts. The literal translation of the word, “tiramisu” is “pick me up,” which is what the cake is intended to do having both coffee and alcohol in it. This dessert originated in Northern Italy, more specifically the Veneto-Treviso area. There are various recipes floating around the internet, but nothing comes close to giving you the authentic taste than this one.

This dessert isn’t a quick one to make, despite the fact that it doesn’t require baking. So plan to make this when you have time to spare. But let me assure you, it’s worth every moment spent when you take the first taste of this mouth-watering cake.

tiramisu2

Prep time: 1 hr. 30 mins.

Refrigeration time: 3-4 hours for best results

Servings: 8-10

Calories: 500 per serving

Ingredients:

6 Large Eggs

1 ½ Cup Sugar

1 pound Mascarpone cheese – room temperature

1 ¾ heaving whipping cream

2 packages of Savoiardi (Italian Lady Fingers)

2 cups espresso

1 cup Amaretto Di Saronno Liquor

2 ounces cocoa for dusting

Directions:

Take a glass baking tray (about 9 inches in length) that’s got a rectangular shape and begin placing the Savoiardi biscuits upon the tray in a row till the whole tray is covered.

Combine the 1 cup espresso with the 1 cup Amaretto in a bowl and mix the two together using a table spoon.

Slowly take small spoonfuls and let it fall on the Savoiardi. The biscuits need to be slightly soaked, not drenched! So it’s soft but not mushy! Set this aside.

Be sure to wash eggs thoroughly before cracking them open and separating the yolk from the white. Combine the six egg yolks with one cup sugar in the top of a double boiler, over boiling water. Stir constantly for five minutes. Once you are done, remove the yolks from the heat and whip them until they become thick like a custard cream.

Add the Mascarpone to the whipped yolks. The cheese may be thick, so beat for a few minutes till it becomes seamless with the whipped yolks leaving no chunks.

Take a separate bowl and add heavy cream with half cup sugar and whip till it peaks. (You can test out if the whipped cream is good to go by placing a fork in the center. If it remains standing up, it is ready).

Add a layer of Mascarpone with the whipped yolks over the Savoiardi.

Add another layer of Savoiardi on top and soak these with the espresso and Amaretto mixture as you did before.

Fold the remaining Mascarpone with whipped yolks with the whipped cream. Add this layer on top till you use it all.

Dust cocoa powder on top.

Refrigerate for 3-4 hours or overnight for best results.

Enjoy!

By: Azzurra Nox

Make Pesto Like A True Italian! Easy Recipe!

Many of you may not know, but I’m half Italian and grew up living in various Italian cities. For this reason, I’m always hesitant to dine out at Italian restaurants in America, because it’s rarely anything remotely close to what the original recipe really is. I always feel bad having to break the news to Americans that their most coveted Italian dish (Chicken Alfredo) is merely an American concoction that doesn’t exist in Italy.

When it comes to pesto, the secret is in the preparation. If you’ve ever actually been to Italy and had a chance to taste the pesto there, you will notice right away that it’s vastly different from the Americanized counterpart you find here in the U.S. at restaurants or sold in jars at stores. First of all, the real meaning of “pesto” in Italian is to “grind/smash.” That means in the original Italian recipe you DO NOT use a food processor or hand blender to get the ingredients to become a paste. Rather, you place all the ingredients in a mortar bowl and grind them using a pestle (see photo for example). This method requires you to manually grind all the ingredients together till it becomes a texturized paste.

pestogrinder

This may take you between 20-25 mins. I know many of us lead very busy lives and may find this takes too long and wish to skip this step and use a food processor, but if you truly want to experience an authentic Italian pesto, you must take the long way! The beauty of this though is, that you can make extra and freeze what you won’t be using, to be consumed at a later date. So pretty much it’s a far more invigorating and delicious meal prep trick!

Ingredients:

1 Large bunch of basil leaves (about 30 leaves washed & dried)

1-2 Tablespoons of Raw Pine Nuts (I love pine nuts so usually go with 2)

3 Medium cloves of garlic

2 Tablespoon of freshly grated Parmigiano Reggiano cheese

2 Tablespoon of freshly grated Peccorino Romano cheese

3 Tablespoons of extra-virgin olive oil

A pinch of salt

Directions:

Begin by chopping up the garlic cloves in four squares and cutting the basil leaves in half (if they’re too large). Once you’re done with this, place both of them in a mortar dish and using the pestle begin to grind and smash them. Do this until they’re completely minced. At this point, add the pine nuts (you may wish to chop the pine nuts if you want to speed up the process first) and using the pestle, mince them along with the first two ingredients. Now you add half of the Parmigiano Reggiano cheese to the mortar and grind and then add the other half. Repeat these steps for the Peccorino Romano cheese as well. Using the pestle, grind till all the ingredients are minced in a paste-like manner. Once you’re satisfied with the consistency, then you add the olive oil and salt to the mortar and using a teaspoon stir all the ingredients together. And you’re done!

Depending on how much pesto you use, this amount can be used for up to 3 dishes of pasta.

This is a very nutritious and delicious recipe that it’s hard not to love!

You can use any kind of pasta for pesto, below I chose to make it with orecchiette pasta because they’re one of my faves, but you can also use spaghetti or zitti if you prefer!

pesto

Buon Appetito!

By: Azzurra Nox